Press brake mechanical designs, control technologies and CNC software have come a long way in recent years. Modern press brakes are designed to be extremely accurate and with excellent repeatability, so they are more than capable of producing consistent results. However, no matter how capable a machine is at performing bending tasks, the final results are always subjected to variations in sheet metal quality, thickness and grain direction that can lead to inconsistent bend angles, wasted material and lost production time.
Reliable and consistent production can be hampered by variations in material thickness when parts are cut from sheets that come from different batches. When blank parts are cut from multiple sheet stocks, there is no guarantee that the material will be consistent from one part to the next. Even minor variations in sheet thickness could require corrections to be made in the program to compensate for this.
Material grain direction is another issue that can cause problems with inconsistent spring back angles. There can be variations in spring-back due to changes in material grain direction as the part is turned and rotated between bends or there may be an inconsistency in the grain direction from one part to the next in a batch of parts. This could be due to the orientation of the blanks when they were cut from a single sheet or if the blanks are cut from different stock.

The normal process for press brake operators is to setup the machine and tooling for a new bending job, run a few test parts, then manually check the results. Unless all conditions are perfect, the operator needs to spend time making manual corrections for each step in the program, then run a few extra parts to make sure the angles are correct and within tolerance.
Of course, all this takes time before production is up and running, not to mention wasted blanks. Even while parts are being processed, it is usually necessary to manually check each part or a sample of parts from a large batch to ensure angle tolerances and consistency are maintained.
To aid the bending process, there are many different forms of angle measuring methods available to machine operators, from manual measurement using a hand-held protractor, to laser-based projection systems and mechanical contact devices. However, having the ability to automatically measure bend angles and use the information to control the bending process can prove invaluable.
BendVision technology provides press brake manufacturers with an economical solution for measurement-controlled bending, as opposed to checking the angle after the bend has been completed. BendVision takes a unique approach through advanced image processing technology that delivers greater flexibility and accuracy for machine manufacturers and users.
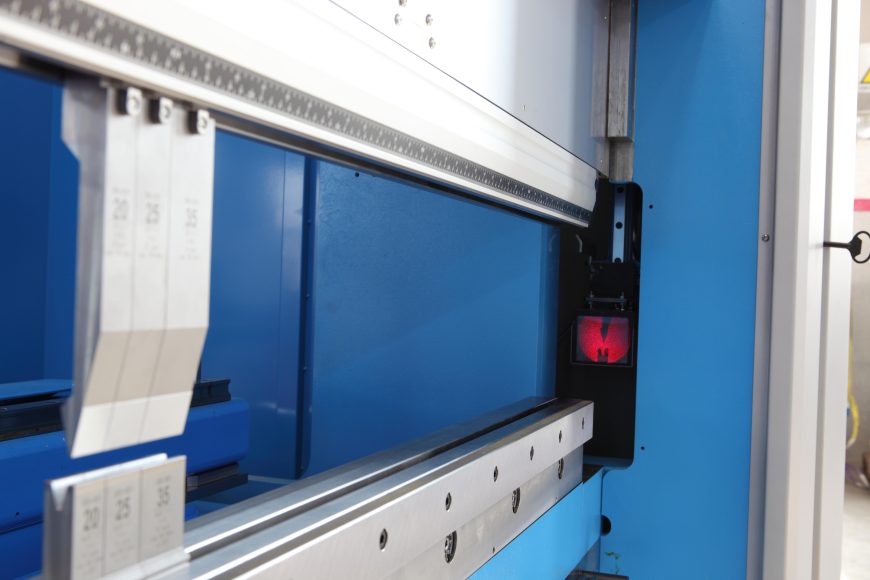
The technology behind BendVision image processing is incorporated into the hardware of the press brake safety guarding system that needs to be fitted to every press brake by the manufacturer anyway to meet ANSI B11.3-2012 standards compliance. The guarding system uses camera technology for optical monitoring of the punch and detection of foreign objects inside the space between the tools during machine operation. When the press brake is in the fast closing portion of the cycle, the camera system is providing the safety function, however once the punch contacts the material surface to start the bending sequence, the optical protection is no longer active. From this point onwards, the camera is sitting idle until the start of the next machine cycle.
BendVision takes advantage of this idle time by switching the camera function to active image processing where images are constantly taken from the end-view of the machine and processed in real-time. By integrating with the existing guarding hardware, the process eliminates the requirement for additional components, sensors and mounting hardware that are normally dedicated only for the angle measuring functions. For press brake manufacturers, BendVision is an efficient and cost-effective technology for incorporating methods to accurately control the bending process.
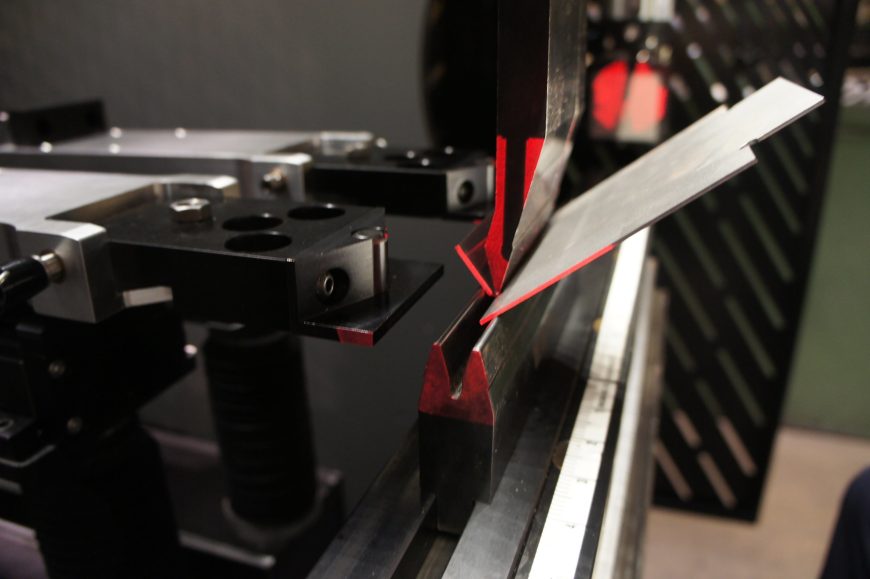
BendVision analyses images of the material and tools during the bending process and by capturing the material limb information, measures the inside and outside angles of the part where both sides are open (a flat profile part for example). When forming a box shaped part where the inside angle is obscured by the side flanges, BendVision will identify, analyse and measure the outside angles.
As a flexible technology, BendVision image data can be utilized by the press brake manufacturer to create a wide range of proprietary angle control methods.
Prima Power
To mitigate inconsistencies that could be caused by variations in material grain direction, the ability to determine the material spring back angle in advance on every single bend, is incredibly valuable.
Italian press brake manufacturer Prima Power has adopted BendVision technology on their eP Series of electric machines. The eP-Press features the advantages of rapid acceleration, deceleration and fast response times of the servo-electric drive system. Compared to conventional press brakes, considerable productivity increases can be achieved with a reduction of cycle times by up to 30% or more.

The addition of BendVision provides an additional performance benefit to an already efficient machine. Prima Power takes advantage of the real-time image data to provide users with a high-speed angle correction function that measures material spring back and controls bending on the fly. sda
Prior to reaching the target angle - 90 degrees for example - the machine will under bend the material to an angle of say 100 degrees, then release pressure on the material while BendVision data analysis takes place to measure the spring back. The part is measured in real-time with 100 measurements per second being transferred to the CNC. What the CNC looks for is the angle value increasing as the material opens up, then a series of consecutive angles that are the same. This indicates that the material spring back has stopped and reached its end of relaxation point. The CNC applies the spring back angle to the final target angle for that bend. For example, if the spring back angle is measured at 1.8 degrees, then the CNC adjusts the targeted live bend angle to 88.2 degrees.
After spring back has been determined, the machine continues to bend the part, following the BendVision real-time angle measurement data until the live angle reaches 88.2 degrees. At this point, bending stops and the material is released while BendVision measures and confirms that the final angle is 90 degrees, plus or minus the tolerance value that is defined in the program by the operator.
This process is quite different to how angle corrections are traditionally handled. Normally, the CNC will take a known spring back value for the type of material or a measured spring back angle and uses this information to calculate a correction required to achieve the target angle. However, this is performed without actually knowing what the final result will be until the part can be measured and the angle confirmed after the bend has been completed. Utilizing the BendVision data, Prima Power takes advantage of live angle bending, where the CNC simply continues bending the material until the real-time measured angle equals the target angle including the spring back value.

Cincinnati Inc
CI (Cincinnati Inc.) was an early adopter of BendVision technology and was the first manufacturer to offer BendVision equipped press brakes to the US market.
The company has developed proprietary angle measuring, control and automatic correction functions in their CNC software to aid in more efficient and accurate processing of parts.
The base function is Measure Only mode that allows the machine operator to define an angle tolerance for the part to be formed. At the completion of each stroke, an image of the part is processed, and the measured bend angle is displayed in a small window on the CNC, along with an indication if the part is within tolerance.
In the Measure Only mode, there is an option to apply an angle correction for the bend step. This option can be selected on a bend by bend basis for each step in the program. If an angle is out of tolerance, an angle correction is automatically saved in the program and the correction value is applied on the next part.
A more advanced Measure and Re-Hit mode enables the machine to automatically measure and re-bend the part to produce a bend angle within the desired tolerance. The BendVision data analysis provides each calculated measurement to the CNC within 10 milliseconds so the machine can make several hits on the material in a very short time span with minimal delay to the bend cycle. Once the angle is within tolerance, the ram will reverse, and the final bend angle is displayed on the CNC.

CI offers BendVision as an option on their Goform electric press brakes as well as Maxform and Autoform hydraulic models up to 10 feet overall length.
By combining safety and measuring technologies into a single efficient and cost-effective solution, press brake manufactures now have greater flexibility in being able to offer angle measurement and control as standard features rather than expensive optional extras.
Through the integration of a BendVision enabled angle control processes, the press brake can aid the operator by eliminating the need to manually make and enter angle corrections. BendVision helps to minimise material wastage and machine production times can be reduced not only through a shorter setup time, but also by ensuring parts are produced more consistently and accurately, irrespective of any material variations.